WOMENSWEAR
The theme for my undergraduate womenswear collection was 'the stripping of excess'. Informed by the passing of my mother a year earlier, it was a call to simplify life and return to basics. Each garment takes on a life of its own, as it begins to shed what it once was and embellishments it no longer needs.
MASS EXODUS FASHION SHOW
Hover cursor to play!
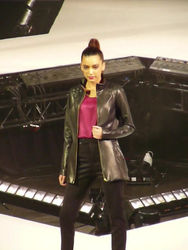
This was the first year Mass Exodus was held in the exhibition hall of the new Mattamy Athletic Center, formerly known as Maple Leaf Gardens. It was an exciting event where our models walked a four-sided catwalk and our names were flashed across the JumboTron.
CONCEPT SKETCHES
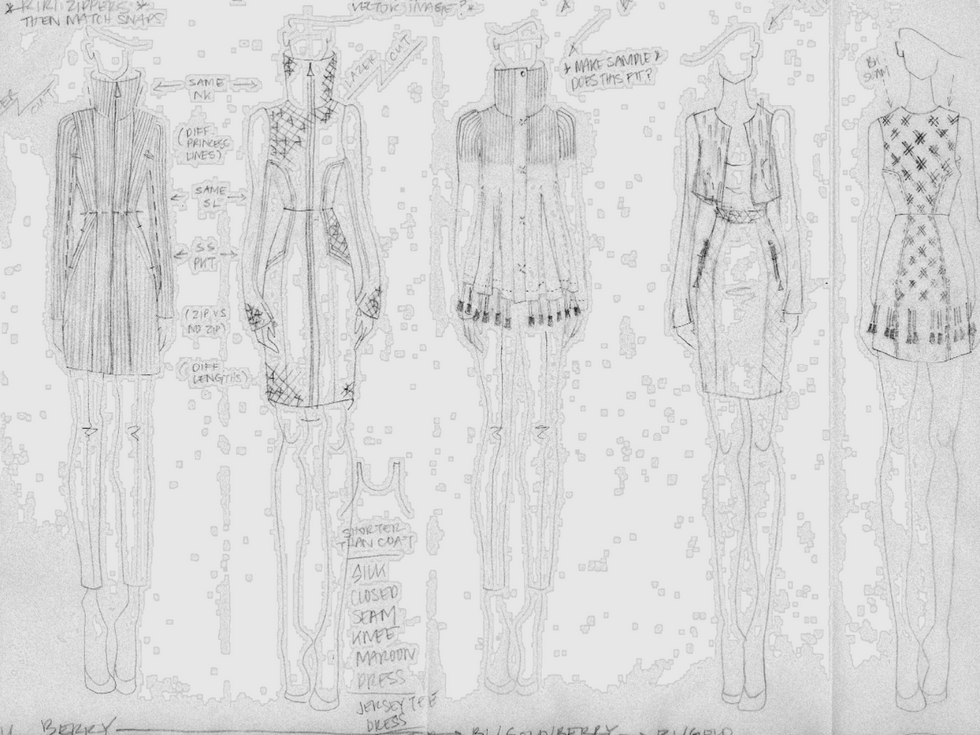
For my undergraduate collection I toyed with the idea of integrating LEDs into garments, or creating a 3D/highly sculptural line in the vein of Viktor & Rolf, but I settled on developing surface design techniques and using them on coats. This collection was my first foray into surface design or fabric manipulation beyond learning smocking techniques. The pieces sketched above (from left to right) show a jacket completely covered in trapunto, patchwork quilting with slits, a combination of trapunto used on the shoulders with the trapunto chords free and peeking out at the hem, quilted side panels on a fitted pencil skirt, and chain woven through the center front panels on a princess line dress to create a criss-cross pattern with the chain free at the hem. Some of these ideas did make it into the final collection as you will see below.
SURFACE DESIGN TESTS
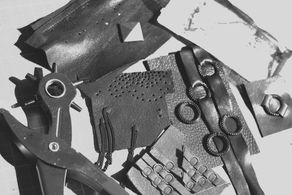
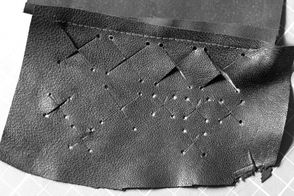
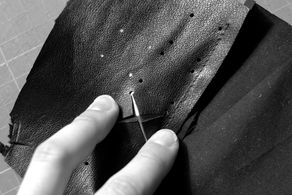
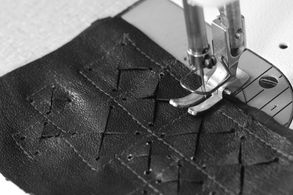


Of all the surface designs I considered from using leather lace to attach metal rings and using chains as fringe (top left), I was most concerned about how I could execute the quilted studding I had planned. The images above show my first attempt developing this technique. I was happy with my prep work slitting the leather (top center), and content with the precision of my sewing (bottom left), but slipping the studs in through the slits so they grabbed the backing and were encased was not working out as I had hoped (bottom center). As you can see the slits in the leather are not equidistant on each side and the stud's corners are showing (bottom right). To fix this I decreased the slit lengths both directions and discontinued the use of the hole punch at the end. This enabled me to sew an eighth of an inch around each slit to improve the overall appearance (final result shown in Surface Design section below). After testing the options for surface designs I was able to finalize the line up for the final collection (see Final Concept section below).
FINAL CONCEPT
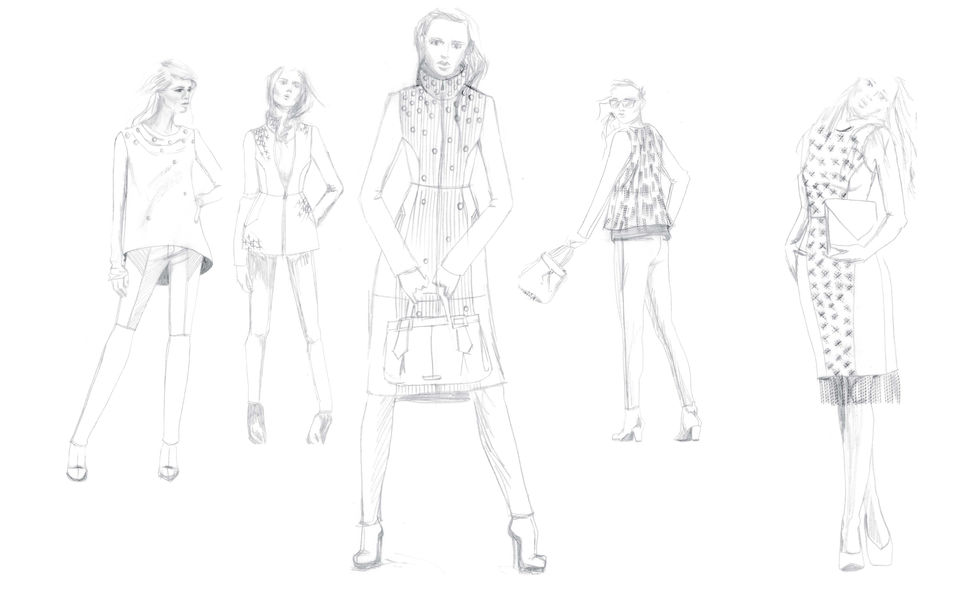
Ideas like trapunto and fringe made of chains did not make it into the final collection. Other changes that were made included using the quilted studs on a hip length jacket instead of a knee length one, to gain better control over its execution. New techniques I was confident in like weaving leather lace through fabric to secure metal rings to it and weaving metal chain through fabric, were applied to larger surface areas to create impact (see center and far right illustrations). To execute everything well and make the collection a reality, I knew that my patterns would need to be impeccable and account for the placement of every embellishment.
COLOUR SCHEME, FABRICS, AND MERCHANDISE PLANNING
Thanks for the sponsorship Danier!

When determining colours to use, I knew the metal would be either an antique brass or yellow gold because I prefer those colours to coppers and silvers. I knew I would have a neutral that would make it easy for a consumer to integrate the pieces into their existing wardrobe and that would act as a background for the brass/gold to pop! I also wanted a third colour so the collection didn't fall flat in editorials/print, so I chose berry because some form of purple had been popular for a few years. I was sponsored by Danier for my final collection because I was previously a finalist in their Danier Design Challenge, so I had my pick of shades and hides to help bring my colour scheme to life!
In terms of merchandising, I wanted to create basics to pair with the statement/novelty pieces that would ease the transition between day and night and improve the commerciality of the collection. So for the first and second outfits, I created a satin/chiffon racerback tank in berry to go with some high waisted knit pants in a denim jean style, and a fine lightweight sleeveless knit tank in black to wear under the cowl sweater. For the fourth and fifth outfits, I designed a satin teardrop sleeveless shirt in black to go with a red-berry twill pant, and a fine lightweight long sleeve knit t-shirt to pair with pin-tucked cotton stretch pants. Any of these basics could easily be dressed down to wear in a casual setting or dressed up for the office, making them highly versatile.
PATTERNING
Here's where it got tricky


The pictures above show a glimpse at the pattern development process and do not represent my final patterns; however, they do show you how detailed and precise the patterns needed to be to meet the desired level of execution. The picture on the left shows the lower center front panel for the dress. Holes were punched out prior to sewing pieces together - they needed to be sewn perfectly so that when I wove the chains through these holes, it did not exceed my tolerance of being off by more than one eight of an inch. When I wove the chain through, I kept it on the spool, cutting off what I needed, and securing it by tacking the ends down to the seam allowances immediately. The picture on the right shows the center back bodice panel for the knee length coat. Leather lace was cut from lambskin and pieces were arranged by length so that I had longer lace to span the length of the garment. If any piecing was required, it was done on the inside of the bodice while weaving the lace through to create a seamless appearance externally. The ends of the lace that were sewn into princess seams were tacked down using leather tape for perfect alignment and to prevent shifting during construction.
SURFACE DESIGN


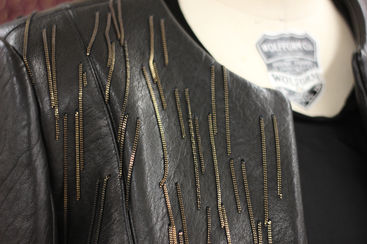

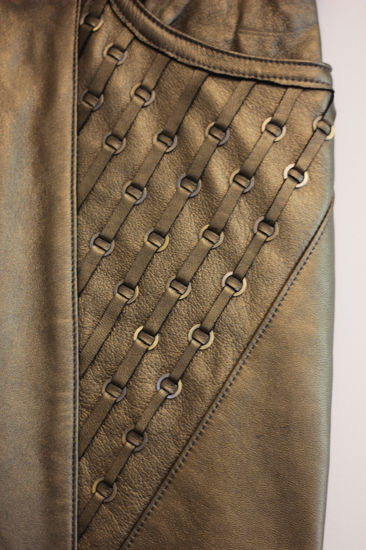
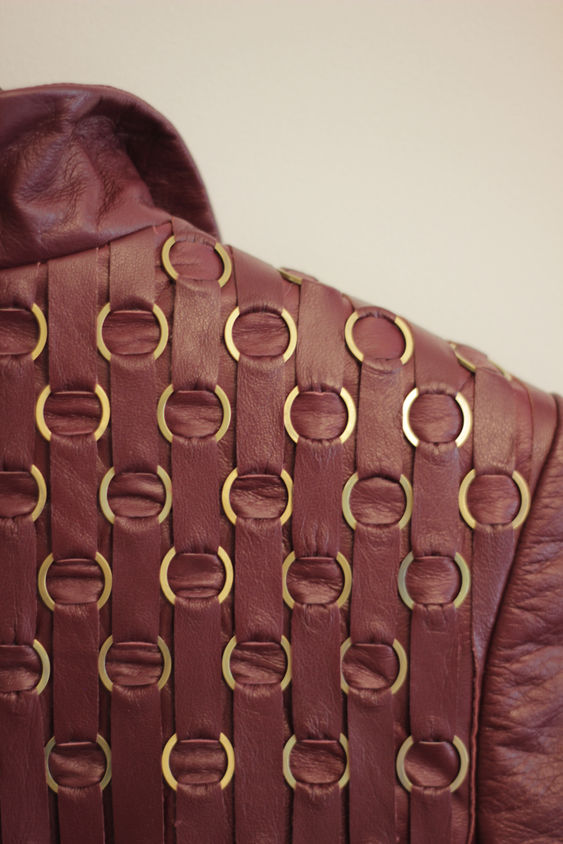
This surface design would not have been possible without the attention to detail needed during the pattern drafting process and the hours spent preparing each panel. Some pieces were easier to construct like the sweater because rings were tacked to the piece as the final step.
FASHION SHOW PREPARATIONS

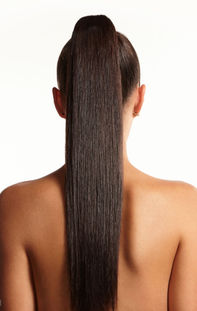


From castings to fittings to alterations and hair/makeup, getting ready for the fashion show was a lot of work but a truly amazing experience! I sent inquiries to model agencies in Toronto, organized a casting on campus, and met with models who had similar hip/waist/bust measurements to my garments. By choosing the models who fit the clothes best, I was able to minimize the number of alterations required. I still needed to alter pant waistbands, but I had anticipated doing so and had used construction methods that made the process easier. Then I met with a hair and make up artist who perfected a high glossy pony tail, a berry eye with a splash of gold, and a rosy lip. Scroll to the top to view videos of the fashion show.


